Seventeen ‘Stay Time’ Foundation & Primer | Review

17 Stay Time 1It has to be said, as a person who generally goes through life from kerfuffle to kerfuffle, there aren’t that many times that I get to feel really pleased with myself. One of those rare moments came a couple of weeks ago though, when out of the blue I was contacted by the lovely Clare from Seventeen (superb name, it has to be said). She had read my recent makeup review of their new highlighter and primer – which you can read here if you so wish – and emailed me just to say how much she had enjoyed it.

It was so nice to hear that brands read what we write (I was especially delighted that she’d liked my ‘Pore-tsmouth’ joke, which I personally thought was a corker) and so the email in itself was enough to make my day – but then Clare said she would love to send us a few other bits to try out. Cue me becoming the most excited person in the world, and Seventeen automatically jumping right to the top of my Nicest Brands EVER list.

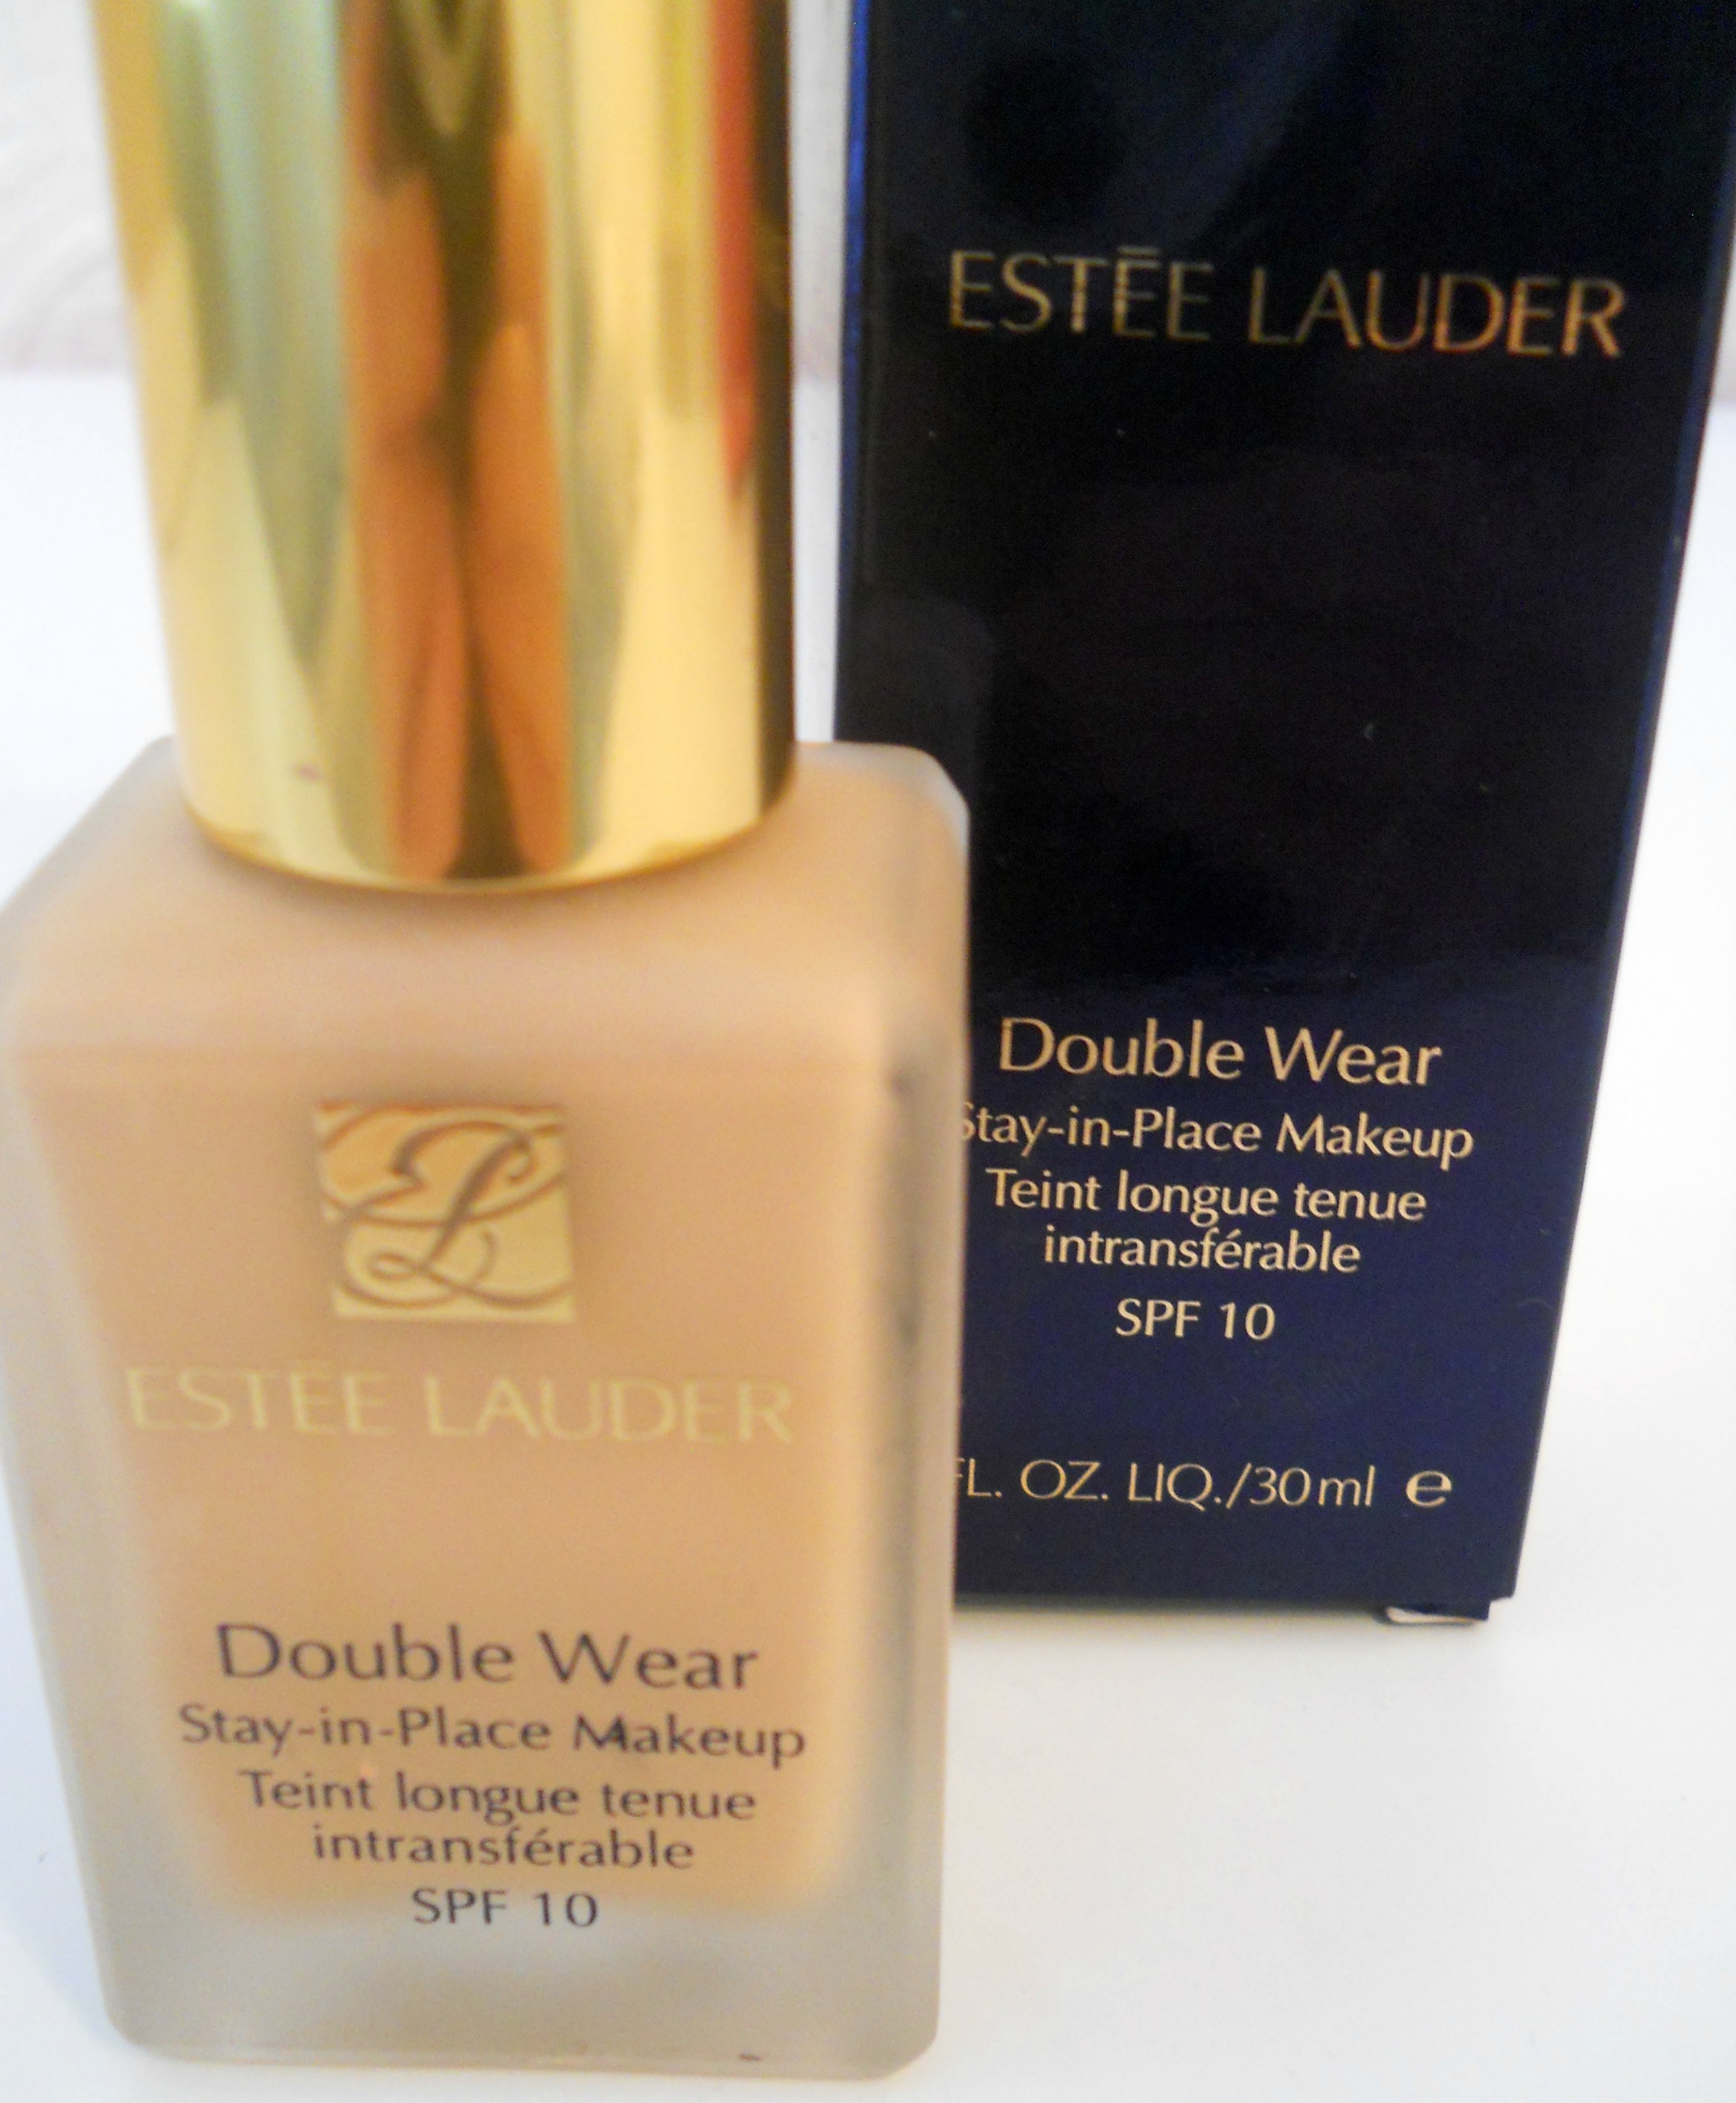
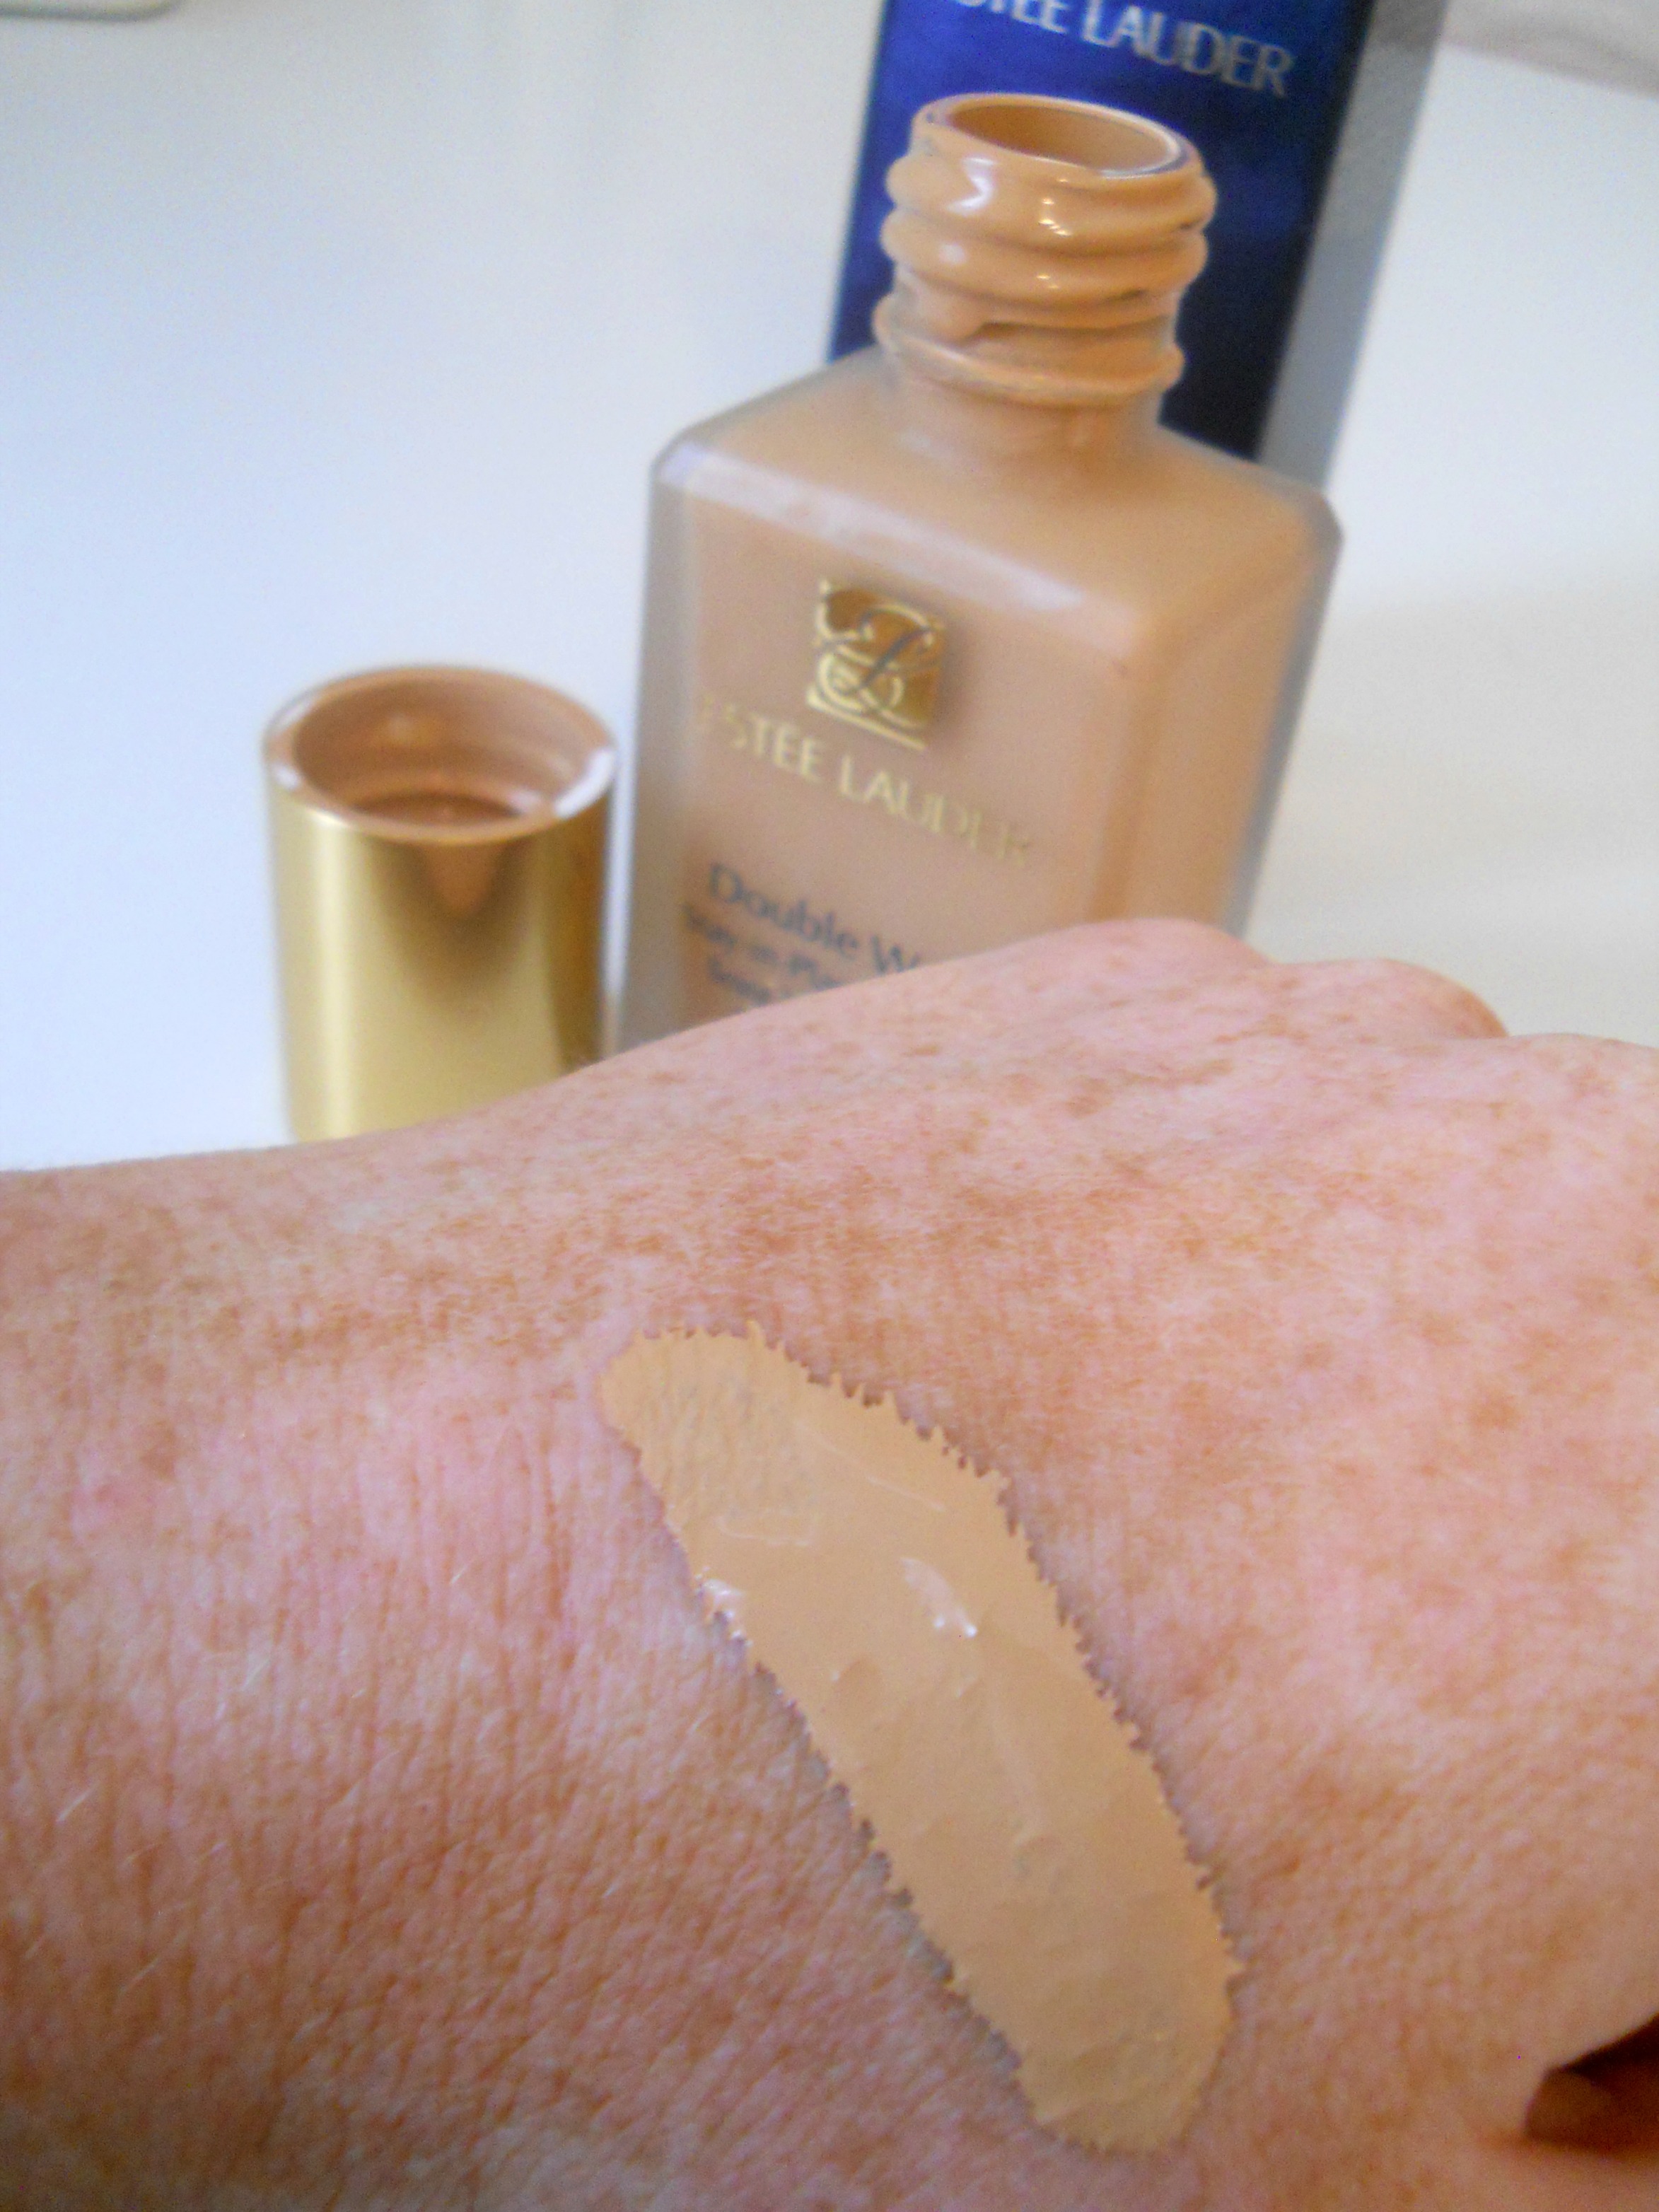
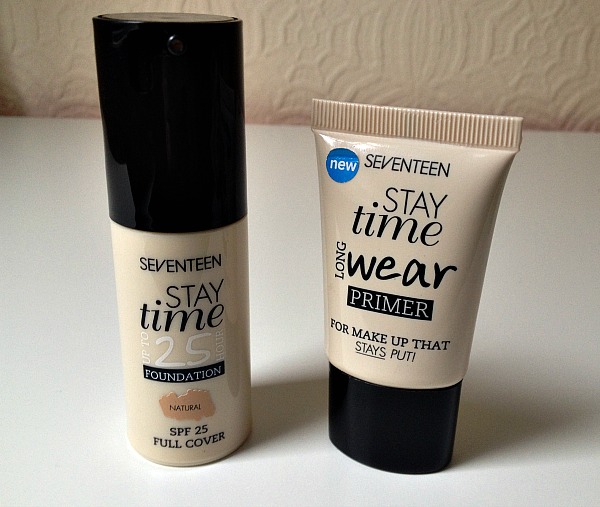
Two of the products I received a couple of days later were the brand new Stay Time Foundation in shade ‘Natural’, and the Stay Time Long Wear Primer. Longevisty is definitely one of the most important things for me when it comes to makeup. I have very long days, generally leaving the house before 7am and often not getting in again until 8pm. My commute to work also includes a horrible bus journey and around half an hour of walking each way, so depending on the weather my makeup is seriously put to the test. This new range’s promise of a long lasting base, then, was music to my ears and I couln’t wait to give it a whirl.

17 Stay Time 2
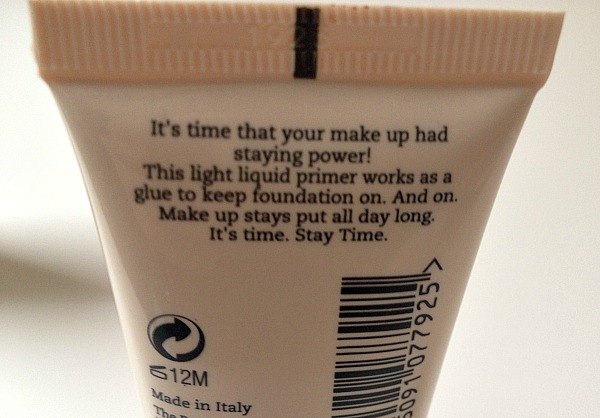
Firstly, the primer. It’s very different to the Flawless Poreless Primer, which in my review I describe as being a very thin balm which you can barely see or feel. Stay Time Primer is the more standard liquid primer that I’m used to. A thin layer of it goes on almost invisibly, but leaves you with a noticeable, slightly tacky base to work with. This sounds unpleasant, but it’s really not.

Next, the foundation. For one, I really like the packaging. You can’t really see in the photo but the pump twists around to lock and unlock – perfect for people like me (what some may call ‘idiots’) who are always losing lids and finding their makeup swimming in leaked foundation. At first I thought that shade ‘Natural’ might be too dark for me, but actually once I started applying it I was pleasantly surprised that I think my pale skin tone can just about get away with it. I buffed it into my skin with my usual brush, and have to admit I did find it a bit tricky to blend. I’m not sure whether it was the foundation itself or, as I suspect, the surface that the primer had created that made it a bit stubborn.

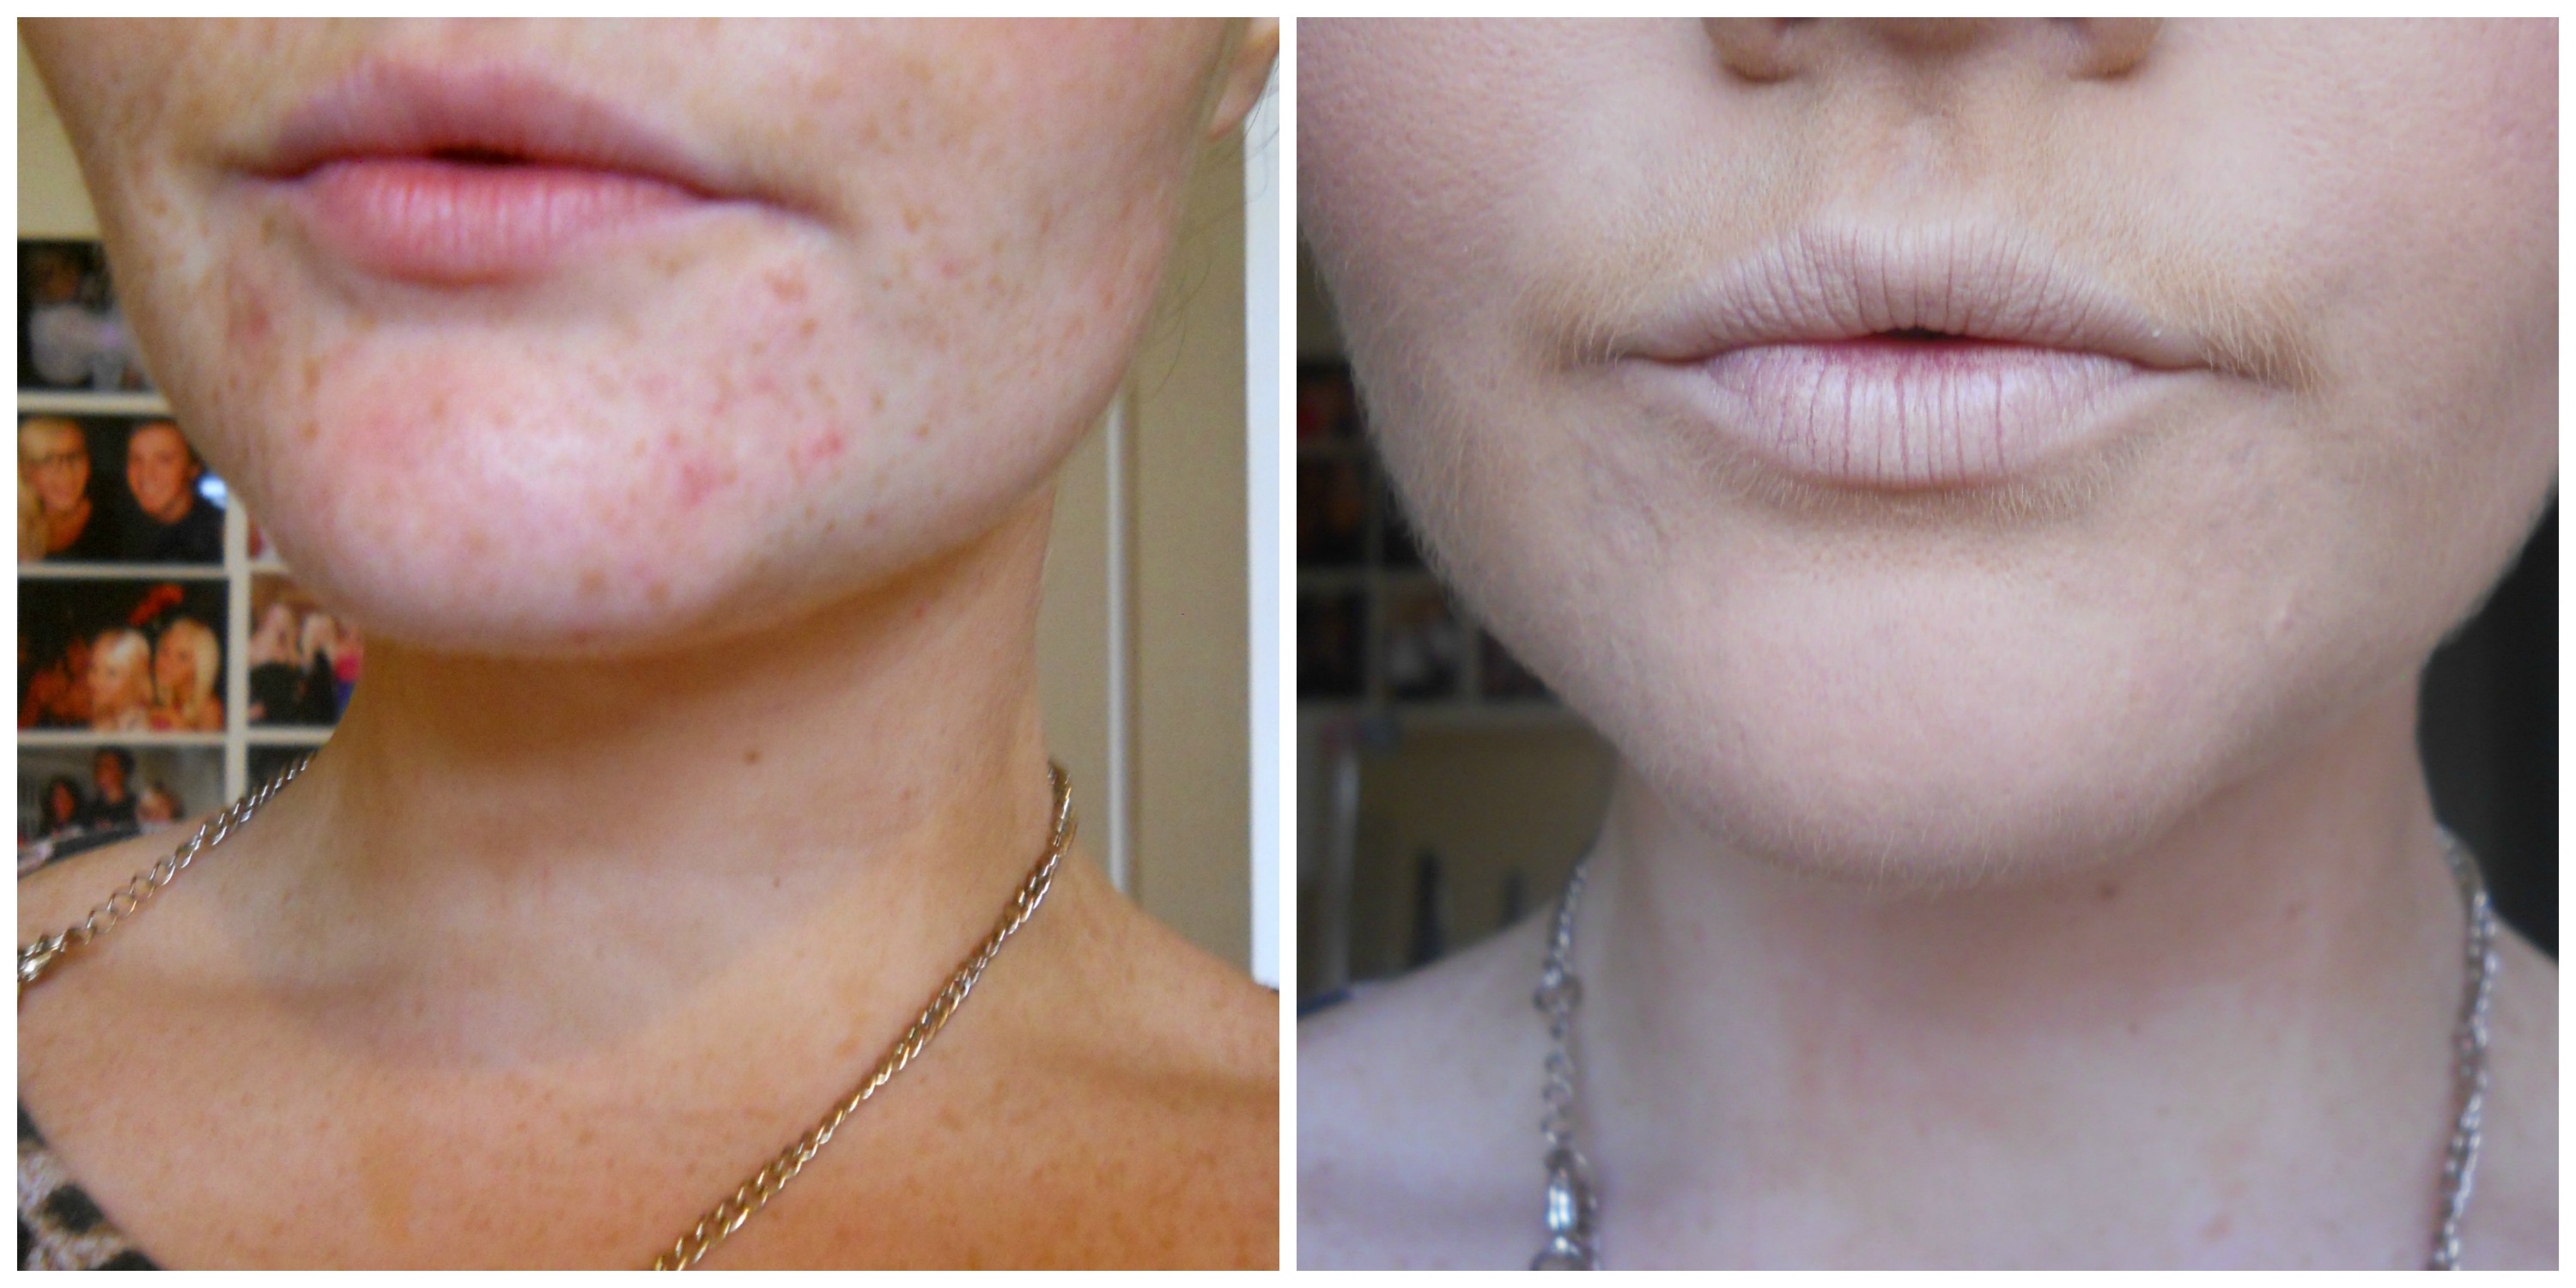
I persevered though and was actually incredibly pleased with the result. Although it’s not listed as one of the benefits, the Stay Time Foundation provided a lovely matte finish, which is perfect for me. It also promises full coverage, which I can confirm it delivers – yesterday I had an extremely attractive spot develop right at the side of my nose, and today the SPOT IT HIDDEN.

17 Stay Time FaceThe coverage might be a bit too heavy for some people, especially when combined with the primer, but generally I like heavy coverage so it was great for me. I was also shocked, nay GOBSMACKED, after raving on about Flawless Poreless so much, to see that my pores are even less visible when using the Stay Time  products than they are with that – so a huge thumbs up.

And what about the most important thing – the 25 hour lasting claims? Well, obviously, I haven’t tested it for a full 25 hours – I don’t know what sort of lives Seventeen’s target market lead, but I for one am usually in bed by half ten with a cup of tea and my Kindle. It did get tested on one of my busy work days, though, and I have to say I am hugely impressed! I had to touch up my powder and blusher through the day as usual, but when I got home in the evening my foundation was looking considerably fresher than it usually would at that time.

I would definitely recommend the Stay Time range  to people who like a full coverage, or for those those who have a busy day ahead of them and want to be sure their makeup is staying put. I also think this will be great for a night out, when we generally want a heavier coverage anyway (and might actually stay up past – gasp – eleven pm!) Overall, I’m really impressed with these products and they’ve continued to change my perception of the Seventeen brand.

The primer retails in Boots for £5.49, while the foundation costs £6.49.

Have any of you tried these products? What do you think of the Seventeen brand?

|| Don’t forget that you can follow us on InstagramBloglovin’ and Twitter! ||

The Best Deep Red Lipstick: MUA vs Sleek

Red Lipstick 1Red Lipstick 3

IN THE RED CORNER… we have MUA  in shade 1 (don’t stretch your creative brains too much MUA, they might explode). AND IN THE, ER, OTHER RED CORNER… we have Sleek in shade ‘Cherry’. These are two different lipsticks from two different brands, but they’re practically identical in shade. So – which is better?

First Impressions

MUA’s shade 1 retails for just £1. This is in itself completely ridiculous. How can a lipstick cost you just a quid? You go into Poundland and pick up a pack of Cadbury’s Chocolate Fingers for a pound and you’re happy to have got those that cheap; never mind a WHOLE lipstick that you can use time and again (unlike the Cadbury’s Fingers, which usually last for approximately one cup of tea). Cherry by Sleek costs the much more sensible price of £4.99, which is still extremely reasonable even for a high street lipstick.

In terms of packaging, MUA has its usual black casing, with the really nifty little pot at the end containing an extra bit of product. Although I know that this is a cool feature, I’m not 100% sure what its actual purpose is. Sleek also has black packaging, though the matte makes it look (correctly) a little more expensive. It’s very small for a lipstick, and actually only has 3.5g of product compared to MUA’s 3.8g. I don’t think that 0.3 of a gram is really going to ruin your life, but it’s worth mentioning – yes, mainly because I’m proud of myself for bothering to look at this detail, and now feel really maths-y like Carol Vorderman. Anyway, moving on…

Swatches

Red Lipstick 2

As you can see, the shades looks practically identical both within the packaging and when swatched on the hand. The only difference in the swatches is that Sleek seems to have a slight edge when it comes to pigmentation, though MUA is still extremely vibrant. Ain’t nobody accusing MUA of being wishy washy.

Red Lipsticks 4Red Lipsticks 5

On the lips, again both shades look practically identical. They both apply nicely, have a very smooth finish and appear very vibrant after only one layer. Ignore the pinky tones in these pictures – both actually appear much deeper than this in real life, and I can confirm they’re BOTH that dark red shade that is so perfect in autumn/winter for vamping up a daytime look or for a glamorous finish on nights out (whatever they are). Both feel very hydrating on the lips and not at all cakey. Of course, a lot of things in life that seem great at first can quickly turn awful – certain men, BBC sitcoms, etc – so the proof with a good lipstick is always in the…

Staying Power

I wore the Sleek lipstick out for my birthday ‘meal and drinks’ shindig last weekend and can confirm that it is a BEAST. After several cocktails and a lasagne, I popped to the toilet to re-apply my lipstick and found that I didn’t even have to. It. Had. Not. Budged. Nor had it started to go cakey; it was just as much of a satin dream as it was when I first applied it. I think I only touched up once or twice throughout the rest of the night (memory gets a little hazy, damn fishbowls) and it never felt at all dragging upon re-application as some lipsticks can. A HUGE thumbs up from moi.

Determined to test the MUA lipsticks under the same circumstances, I FORCED myself, in the interest of RESEARCH, to head out on Saturday night for another couple of cocktails. You have to test things in the same conditions; that is just a fact I learned in Science GCSE. Although the colour stayed vibrant and looked okay overall, I did notice that after a couple of drinks the colour had began to come away from the inner part of my lip and needed touching up. Again though, it re-applied very well so wasn’t really a huge drama.

The Conclusion of the Matter

So here we have two insanely similar lipsticks, both extremely good value for money and very good quality. I think Sleek has a slight edge on MUA in this instance, due to being a bit more pigmented and longer lasting. MUA is only one pound and so a complete bargain, but then I also think £5 for a lipstick is really reasonable so can’t fault Sleek for pricing either. This was my first lipstick from both brands, and I’m happy to report that I’ve been left with a great impression of them both and will definitely be stocking up on more of them in the future!

Red Lip 6
Me wearing MUA 1

What do you all think of MUA and Sleek?

|| Also, don’t forget that you can follow us on Instagram, Bloglovin’ and Twitter! ||

Bourjois Bronzing Primer | Review & Contouring

Hello chums.

Well here I am again, legging it after the bandwagon because I have well and truly missed it.

On a recent shopping trip, I nipped into Boots and decided there was nothing in life I needed more than some kind of bronzing cream with which to contour. After watching Laura Leigh’s (from Belle’s Boutique) contouring tutorial (in which she used Tom Ford’s Shade and Illuminate), I have been a-hankering after a cream to use with my foundation – instead of using highlighter/bronzer after powdering. After sneaking around Boots wondering if such a highstreet product existed, I had a stroke of wizarding genius. BOURJOIS BRONZING PRIMER*

1385397_10152483790917565_1175074920_n

I have read so many blogs that have reviewed the Bourjois Bronzing Primer and most have raved about it. But I have to say, it’s completely baffled me why you would want a primer that bronzes your face too. Fine if you are a gal who just wears primer out (do any lunatics actually do this?), but for us gals who like to trowel on foundation with gay abandon – WHAT IS LE POINT? 

So I decided to be a maverick and use this product for something it wasn’t meant for. ‘Pardon and what?!’ I hear you say. Yes, that is correct; I don’t play by anyone’s rules, not even my own.

I figured that because it was cream based, bronze in colour – it would do the job that Laura Leigh’s Tom Ford product did so brilliantly. AND WAS I RIGHT OR WAS I RIGHT?!

1374811_10152483790872565_1576754767_n

As you can see, this is quite an orange product. I would suggest that if you don’t slap on St Moriz like the Fake Tan Fuhrer is after you, it might be a bit too orangey for pale skin. However, I am permanently an orange, glowing beacon of hope ridiculousness – so the colour is perfecto.

I won’t bore anyone too much with how I went about contouring. In brief, I stippled product onto my hairline, cheekbones, nose and chin. I blended vair well (to avoid looking like I had tried and failed at lion fancy dress) and added highlighter. Watch Laura’s vlog for the full how-to, she’s much better at it than I am.

1383999_10152483800142565_1809942448_n

And this was the result. Not too shabby for my first attempt at cream contouring and I’m pleased with how the Bourjois Bronzing Primer performed in it’s second role. I’m sure there’s a joke here about being a poor, single mother working two jobs to survive but unfortunately I can’t quite reach it. My look is much more subtle than Laura’s, but as I’m off for luncheon and it is only 11am, I didn’t want to look too mad.

The Bronzing Primer retails at £9.99 if any of you gals are interested.

*They also do a bronzing cream. Which was right next to the primer at Boots. Do not question my logic, I have none.

What do you all thnk? Tempted to try using this as a contouring product?

|| Don’t forget that you can follow us on InstagramBloglovin’ and Twitter! ||

Barry M ‘Natural Glow’ Eyeshadow Palette | Review & Swatches

Barry M Palette 1 Barry M Palette 2 Barry M Palette 3Ever since writing our post on the Barry M new releases I was feverishly excited to try out the new products. Despite some misses (Brow Pen, we’re looking at you), Barry M are a brand we both love and so I was eager as the proverbial beaver to see them work their magic in their latest products.

I was particularly interested in the eyeshadow and blush palettes, so when I was in Superdrug recently I nearly jumped for joy when I saw that this was finally in stock. I chose the ‘Natural Glow’ palette as, let’s face it, neutral colours will always have my heart and loins. Plus, it had the nicest blusher shade of the three so I was completely sold on it.

On first impressions, this is a gorgeous palette. The packaging is sleek, sturdy and contains an extremely useful and good sized mirror in the lid. It also comes with two applicators, which I don’t think anybody ever really uses but, well, we’d moan if they didn’t include them, wouldn’t we? I like the colour range (though if I was being picky I would like them laid out from lightest to darkest, but Barry M weirdly didn’t ring me to ask my opinion on this) and the equal mixture of shimmer and matte.

So, all is looking positive. And then we move onto the application…

988716_10152481766502565_895789291_nand very unfortunately the product falls down a little bit for me. The pigmentation is simply not as good as I was expecting. It’s much better on the shimmer shades than the matte, but as I’m more a matte girl anyway this isn’t much comfort to me. I mean, really, can you even see that first shade? It just looks a bit like a bruise, and that’s not reeeeally a look I go for.

I’ll hold my hands up and say I’m WUBBISH at applying eyeshadow, so I really need quite strong pigmentation to actually be able to see what I’m doing. People who are naturally more skilled in the eyeshadow department (i.e. everybody, probably even my neighbour’s dogs) will probably be able to get more from the palette, but for me it’s a bit  too much of a struggle trying to work colour into the crease for quite little payoff. I think maybe I’ve been spoiled by MUA’s Undress Me Too (which you can see me rave about here) which is just amazingly pigmented.

On the bright side, this morning I realised that the third shade along is actually the perfect match for my light eyebrows so I’ve used it to fill them in a bit. It took quite a few layers to actually, er, see it at all but I’ll definitely get some good use out of it in that respect.

996935_10152481766547565_892204057_nThe blusher is a bit more pigmented than the shadows. It’s still quite subtle, but that’s better with blushers anyway because at least you can’t get carried away and end up looking like a clownish idiot. As you can see, it’s a nice pale pink with a slight glimmer to it so I’m much happier with this part of the palette.

These retail for £6.49, which is still an excellent price for six shadows and a blush, and to be honest it still makes a good addition to my makeup bag as a product I’ll turn to now and again. Kind of like if I was a Victorian man and had a mistress – you know, like I’ll never really love her but she’s good for a bit of a change now and then. Yep, that’s my analogy and I’m sticking to it.

Have any of you tried the Natural Glow palette from Barry M? What did you think of it?

MUA’s £1 Wonders: Blush & Powder | Review

MUA 1I used to be the most loyal customer of Boots in the entire world. I was an absolute Boots wifey, and the very thought of going to Superdrug made my lip curl in disdain. Why would I go to Superdrug when I can collect millions of points on my Boots card? Why would I go to Superdrug when Boots have such a superb Meal Deal?  Why would I go to Superdrug when at Boots I can be served by people wearing those funny tunics that make me feel like I’m some sort of beauty professional?

Well, ladies and gents, I am quite the changed woman these days and I regularly cheat on Boots by going into Superdrug too – sometimes I even go to them both in the same day, which just makes me a proper shopping sket. There is one brand in particular to be blamed for my infidelity: the Superdrug-exclusive MUA.

MUA has only really been on my radar for around a year and at first I dismissed the brand as simply too cheap to be any good. Then Lauren raved about their £1 lipsticks, and I discovered for myself the wonder that is the Undress Me Too palette, and then it was safe to say MUA had creeped its way up my favourite brands list.

I picked up both of these items in the last couple of weeks and both amazingly cost me just £1. There isn’t a huge amount to say about the powder – is there ever? It’s translucent and stops people being able to check their reflection in my nose, which is all I can ask for really. The range of blushers is much more interesting. According to the Superdrug website, there are six shades available in the £1 range (you can see them all here): Bon Bon, Cupcake, Lolly, Marshmallow, Candyfloss and Bubblegum. Completely sickening names aside, the colour range is nice, ranging from pale peach through to bright purpley-pink.

The shade that I picked up was Candyfloss, a rather cool-toned pastel dusky pink:

MUA 2(On a side note, am I the only one quite impressed that they bother with the MUA imprint inside the compact? If I was selling something for only a quid I’d probably just put the powder loose in a little sandwich bag and throw it at customers.)

MUAIt’s a really nice colour which seems pretty perfect for winter, and is also a nice match on my new pasty, corpse-like pale skin. My only real bug bear is the flecks of glitter running through it – how hard is it for brands just to make matte blushers, I ask you? Pigmentation wise, though, it’s really impressive. A little goes a long way, to the extent that when I put a bit on without using a mirror while sitting at my desk at work the other day, it wasn’t until I went into the toilet that I realised I had accidentally made myself look like a clown (thanks for the heads up Lauren, you twit).

Overall I’m really pleased with these cheap and cheerful MUA products. The packaging is simple, but all that’s needed – and perfect considering these are the types of products you’re likely to carry around in your handbag anyway so don’t want to worry about having to keep pretty. I’m particularly impressed with the blusher, and think I’ll definitely be ‘investing’ (giggle, giggle – no really, I’m skint, that pound will be an investment) in another couple of shades for my makeup bag.

What do you all think of MUA? Have you tried either of these products? 

Barry M Liquid Brow Marker Pen: Review

I hate to be the bearer of bad news (what am I talking about, I LOVE BEING THE BEARER OF BAD NEWS), but this is going to be a blog post full of hatred and disgust.

I’m usually a big slut big lover for all beauty products and I don’t usually dislike things very often. As long is it vaguely looks ok, then it will have a place in my leopard print makeup bag. Unfortunately, today is a day that I have to hate on a beauty product. I have tried to like it, I truly have. But I just can’t, mainly because it doesn’t do the job properly and makes me look like an idiot.

1235131_10152404406212565_1157700395_n

This mysterious product, if you hadn’t gathered from the giant picture and the title of this blog post, is Barry M’s Liquid Brow Marker Pen. I bought it at the weekend because I’m on the dregs of my Sleek Brow Kit (which I love by the way!) and I also needed some change for the bus (which is a great excuse to pop into Boots if you ever need one). I decided to branch out and get something different to my Sleek Brow Kit and spotted this eyebrow product lurking in the Barry M makeup display. You might have heard me shout ‘GREAT SCOTT, what sorcery is this’ if you’d been there at the time, as I rushed to shove it in my basket and pay.

I really like the idea of marker pen style makeup. They’re great for the cack-handed like me, and it makes me feel a little bit like Picasso every time I draw on my face. Unfortunately, the Liquid Brow Marker Pen actually made me look like one of Picasso’s abstract paintings and I have to say that this is THE MOST USELESS product in the history of useless products. I have a few main issues with it, which I have decided to list in a handy list (oo-er) for you all.

PicMonkey Collage

1. It doesn’t work properly if you have any foundation/makeup lurking in your eyebrows: This is an issue. I don’t know how you all do your makeup, but I tend to whack on my foundation/concealer and then do my eyebrows. This means that there tends to be a bit of product in there and while I could remove it with a cotton bud, why on earth would I bother doing that?! The problem with the Brow Marker Pen is that once the nib (ew) gets a bit of other product on it, it stops working. Basically, no more brown eyebrow stuff comes out of it and you look like a fool scraping away at your face with useless marker pen that is progressively ruining your morning makeup.

2. The colour that comes out is uneven: Even if you manage to get the pen working normally, the colour that comes out isn’t that even. I don’t know about you guys, but I don’t have time to faff around going over and over my eyebrows to make sure they don’t look patchy and bald. NO THANK YOU. (This is particularly problematic for me, because I have to draw my eyebrows on from scratch. I have blonde brows, so it is a full on mission rather than just filling in!)

3. The ends of your eyebrows are DIFFICULT to do: As you can probably see from my tragic eyebrow picture, doing the outer ends of your eyebrows is really difficult with the Brow Marker Pen. I find that it slips a bit and gets all wonky. If the nib has stopped working too, then you have to faff around trying to use the side and IT ALL GOES HORRIBLY WRONG AND YOU END UP LOOKING LIKE A MAD PERSON.

All in all, I ended up spending longer on my eyebrows than the rest of my face when using the Barry M Liquid Brow Marker Pen. What is the point I ask you? This product might be ok if you already have dark eyebrows and just want to fill them in a little bit, but if you’re looking for heavy duty eyebrow makeup like I am, don’t bother. I was forced to fill in and try and fix the Brow Pen disaster with the last of my Sleek kit, and this was the result. Much better, ja?! JA.

560848_10152404418292565_1924766633_n

I think I’m just going to go back to my Sleek Brow Kit but if you guys have any other recommendations, please let me know! I would love to try something new and not tragically horrible.

|| Don’t forget that you can follow us on Bloglovin’ and Twitter! ||

Estee Lauder Double Wear: Review

I have pretty much been using the same foundation for about 4 years: Rimmel Lasting Finish 25 Hour in Soft Beige. I really love it, I find it has a good heavy coverage, stays on for ages (albeit not quite 25 hours…) and it’s also hugely cheap (usually around £6.99). I’m a gal who is not a fan of change, particularly when it comes to makeup. So using a new foundation hasn’t really occurred to me until recently. I think it’s part of my ‘I am now a grown up, it’s time to stop being ridiculous’ phase (which has included buying a pair of brown shoes and saying ‘indeed’ a lot) and part of that phase is using better makeup products.

DSCN2808

I decided on my new grown up adventure to ask our lovely Twitter followers what foundation I should get for heavy coverage, and the general consensus was that Estee Lauder’s Double Wear is one of the best around. I definitely trust you lot when it comes to makeup recommendations, so I swiftly got to my nearest Selfridges to get involved with the Double Wear hype.

I was colour matched by a lovely lady called Charley and we decided to go for a colour that was a bit warmer than my actual skintone because I fake tan a lot and no one wants the whole pale-face-orange-body situation. I ended up buying the ‘Dawn’ shade, which blends well with my St Moriz colour but can also be lightened up with a bit of concealer in strategic places if necessary.

DSCN2811

Excuse my HORRIBLY freckly skin but that is just how my hand rolls.

I won’t go into too much detail, but the product is quite a bit ‘runnier’ than the Rimmel foundation and is also LOADS less oily, mainly because it doesn’t contain any oil (surprise there, eh?!). I’ve found that this means I use a lot less because it glides on quite a lot easier than my usual foundation. It also feels really light, which is excellent – heavy coverage with a light feeling is something I’m definitely not used to! I feel like I have lost about 2 pounds from my face.

PicMonkey Collage

Staying-wise, I’ve been pretty pleased with how it keeps throughout the day. Being totally honest, I don’t think it performs any better than the Rimmel Lasting Finish product. Set with powder, they both are on a par. What I do like is that the Estee Lauder Double Wear is lighter, matches better with my skin tone and also has a smoother finish than the Rimmel product.

Higher end makeup is something I want to get more into, and this is an excellent starting point! I would most defs reccomend it to anyone who likes to trowel on their foundation a heavy coverage.

What do you guys think? Anyone else given the Estee Lauder Double Wear foundation a whirl?

Revlon ColourBurst Lip Butters | Review

Revlon Lip Butters 1As I’ve stated probably more times than is necessary (and definitely more times than is attractive), my lips get dry quite easily and so lipsticks can often drag or look a bit cakey after a few applications. So while I was on the hunt for a new lip product this weekend, I decided to give Revlon’s much-loved Lip Butters a go. These are known for being smooth, hydrating alternatives to traditional lipsticks, so I thought they could be perfect for my flaky needs.

The Revlon ColourBurst Lip Butters usually retail at £7.99 each, which I think is a leeeeeedle bit pricey for a ‘buttery balm’, but seeing them on offer at 2 for £10 meant that I obviously had to get two. I chose shades 040 Red Velvet and  047 Pink Lemonade, which is one of the newer colours.

Revlon Lip Butters 2Red Velvet is a nice deep red, which I thought would be brilliant as we get into Autumn, both for nights out and during the day if I’m feeling a bit dramatic. Pink Lemonade is the sort of colour I’m always naturally drawn towards; a pale peachy-pink that’s perfect for everyday wear.

So, how did they turn out?

040 Red Velvet

Revlon Lip Butter RedThe texture of the Lip Butters is lovely – they glide on smoothly, just like a balm. The colour pay off of Red Velvet after one application is pretty good, though you definitely need a couple of layers to get something near the colour in the tube. As you can see from the photo, it’s difficult to get the proper build up of colour that you get with a normal lipstick. It’s much more sheer, so slides around on the lip rather than settling as a lipstick does, making it a bit messier to apply than I would have expected. If you like your reds to have a matte finish then this isn’t really for you, as even with blotting it doesn’t really lose its sheeny finish.

047 Pink Lemonade

Revlon Lip Butter PinkOne swipe of Pink Lemonade does practically nothing to your lips – it literally just feels like you’ve applied some lip balm. Again, you need a couple of layers to start to see proper pay off from this very sheer lip product. Once you’ve applied it a bit thicker though, the texture and finish of this are lovely. Lips feel hydrated and smooth, with no possibility of dragging and drying out. The finish is perfect; somewhere between a gloss and a lipstick, it actually reminds me of the Cremesheen finish of my beloved MAC Creme d’Nude.

Overall, I do like both of these products. The Revlon ColourBurst Lip Butters are the sort of hybrid products that have been gaining a lot of popularity over the last year or so; along with Apocalips and Babylips, they’re aiming to give us the best qualities of lipsticks, glosses and balms in one product. From a personal point of view, I think the Lip Butter texture definitely works better in the paler shades, where the sheerness is less of an issue.

Have you tried Revlon’s Lip Butters? What did you think?

Benefit Primping With The Stars: Review

Good morning and happy Sunday to one and all!

I’m back on my makeup reviewing hype and I am VERY excited about it. I’ve been having some vonderful chats on Twitter with you all about making some makeup changes in my life (and we all know how important these changes are…), so I thought I would do a little review on something that I have been loving a lot recently.

1081662_10152383178302565_2076382288_n

One of my best friends from uni (combined with her boyfriend, who is also a good friend) bought me this Benefit set for my birthday and I have to say how HUGELY excited I was when I opened the wrapping. I’m a big Benefit fan, I know some people are not quite as keen on it as some products can be seen as a bit ‘gimmicky’. But I’m quite a gimmick fan and the packaging makes me literally want to die with happiness inside. I had their smokey eyes palette for a long time when I was a bit younger and I still maintain that it has been my favourite eye kit to date.

The Priming With The Stars kit has a lot of the products I have wanted to try but haven’t been able to afford recently, so I love the fact that I could give these a whirl FOR FREE, and in smaller sizes so I can decide how I feel about them without having the big version (sorry about the terrible English in this sentence, my brain has fallen out).

1082720_10152383178372565_768560497_n

1. Stay Don’t Stray Eye Primer. 2. Pore Professional. 3. Some Kind of Gorgeous Foundation Faker. 4. Benetint. 5. Girl Meets Pearl Highlighter. 6. They’re Real Mascara.

So, what do I think of Benefit’s Primping With The Stars kit?

1. Stay Don’t Stray Eye Primer: I really like this primer. I’ve been loving eye primers recently, I find they keep my standard liquid eye liner flick in place without smudging. This one has a nice nude tint to it, so almost works as a concealer too.

2. Pore Professional: This is a kind of tinted primer and as far as primers go, I’m very impressed. I have very big pores and it really does reduce them significantly! It’s also tinted, which means it can be worn without makeup over the top.

3. Some Kind of Gorgeous: This is the only product that I’m not hugely keen on in this kit. It just doesn’t give the kind of coverage that I like – I love full coverage foundation and this is very, very light. For people who like a light foundation, this is great for a matte effect! I do like it, it’s just not heavy enough for me.

4. Benetint: I LOVE Benetint and I have for years and years. I like the rose colour for my lips and Posietint for my cheeks particularly, so I’ve been using this little one on my lips a lot recently. Not much more needs to be said, it is great.

5. Girl Meets Pearl: I love highlighters and this one is great. I’ve been using it on my brow bone and cupids bow mostly, because the blusher I’m using at the mo is quite shimmery, so I don’t want to look too disco-ball  like. Very impressed!

6. They’re Real Mascara: Everyone raves about this mascara and I was always a bit skeptical about it. I am no longer. This is amazing and I’m very very tempted to buy the full size when this runs out. BRILLIANT.

As a set, I’ve actually been keeping this in my handbag because it has a big mirror that’s useful if I’m doing my makeup on the train or bus! It’s also nice having a Benetint and mascara on me at all times, it reduces the panic in case you get invited to see Rihanna and have no makeup on you whatsoever.

My verdict? This kit is brilliant. I really recommend it for you gals who want to try some of Benefit’s most famous products without investing in the full ones. There is also a little booklet with handy tips, which is great if you are an idiot like I am.

Anyone else tried this kit? What do you reckon?